 |
| meteorites? rocks? bubble gum? |
Our dryer developed a nasty squeak over the last month. At first it was only at the beginning of the cycle, until it got warmed up. But gradually the squeak time lasted longer. And louder. Until finally this last week or so it was driving us batty.
So Joe decided it was time to take things into his own hands and see what he could see.
"You come, too, please. I want to show you what's inside there so when I'm dead and gone you will be able to fix it yourself."
"Hmmm."
I took my computer down with me, so that Joe would have handy access to various youtube videos and exploded view diagrams of the dryer innards.
But we were stymied right away. Neither of us could remember how to get the top off. We undid the screws on the back. Joe thought the next step was the top, but how? I thought the next step was the front, but how? And at first glance the internet was not very forthcoming with the information we needed. So I got back to my crochet and Joe did a little more searching.
Joe was right. The next step was the top. When he had that off, he called me down.
"Can you bring the vacuum down here and clean this lint out for me?"
Joe saw right away at least one problem. One of the plastic electrical connectors had melted at some point. Yikes! A striking proof of the providential protection of our Heavenly Father.
 |
| melted electrical connection |
After I was done, I returned to my crochet. Joe came back down to remove the front panel.
"Can you come down and get the next section cleaned out?"
Joe went back to his pastor work while I cleaned out more lint. Handfuls and handfuls. Some of it nicely felted. Some of it simply thick pillows.
After I was done, I returned to my crochet. Joe came down and took the drum out.
"Can you come down and get the next area cleaned out?"
I once again went downstairs and cleaned out lint. This part was also a bit worrisome, since there was a thick layer of toasted lint on the back of the drum. Another striking proof of the providential protection of our Heavenly Father.
When I was done with this, Joe came back down. I did not return to my crochet, but stayed with Joe so that he could teach me all he knew about how this contraption works. Then we took the drum itself apart to get the lint from all the nooks and crannies there. We also took the little paddle things our of the inside of the drum, to clean inside of them.
All in all, we came up with about a dollar in change, a couple of foam ear plugs, several bobby pins, some candy wrappers, rubber bands, and a few other small gizmos.
And lots and lots of lint. This photo is the big chunks that didn't get sucked into the vacuum. It's hard to tell in this photo, but it fills a plastic grocery bag pretty much all the way. Notice the toasted lint on top? That's the part that was between the drum and the heating coil.
 |
| lovely bag full of dryer lint, including some nicely toasted |
He checked online to see about the melted electrical connection pieces and decided there was no place in town that would be likely to stock that variety. But he's pretty good with electrical know-how, so he figured out a way to fix it without having to order anything. But his wire cutter tool seems to have wandered off. After making a few phone calls, Joe found one at Ryan N.'s. He sent me over to get it while he returned to his pastor work.
When I returned with the wire cutter, Joe said, "You come, too, please. I want to show you how to do it so when I'm dead and gone you will be able to fix it yourself."
Joe clipped melted pieces off, and stripped a scant half inch of plastic off the wires. This part was a little tricky, since the plastic insulation near the melted connectors had also melted, and was stuck into the bundled copper wires underneath it. But with some finagling, Joe worked them off. Then he used one of those handy-dandy twisty cap things and put the wires back together without the plastic connector pieces. He showed me how to do one wire at a time, so as to avoid reconnecting them wrongly. He even let me twist one of them together. But I did notice he kind of tugged on it after I was done to make sure it was going to stay. I didn't notice him doing that to the one he twisted.
Then we put the dryer back together: baring, drum, belt, front, top. And we started it up.
And still, it squeaked.
Time to order some parts. Joe found new bearing pieces online for about $35. He thought the heating element looked kind of sketchy and that could be ordered for $90.
That was getting close to the amount that causes one to ask if the repair is too costly. We have a ten year old dryer. A ten year old dryer originally estimated to last seven years. And a ten year old dryer originally estimated to last seven years for an average sized family.
And were there other parts that warranted replacing, too?
Joe decided on soliciting a second opinion from Kyle N.
Good news! Kyle thought every looked fine except the bearing. Even the heating element. Kyle is a tinkerer. He knows such things. What great news! A striking proof of the provision of our Heavenly Father.
The most interesting things we pulled out of the dryer came from inside the paddle or fin things inside the drum.
The action of constant spinning combined with the shape of the inside of the fins seems to be conducive to creating unusual spheres of lint. Mostly spheres, but also some other fun shapes.
 |
| dryer detritus |
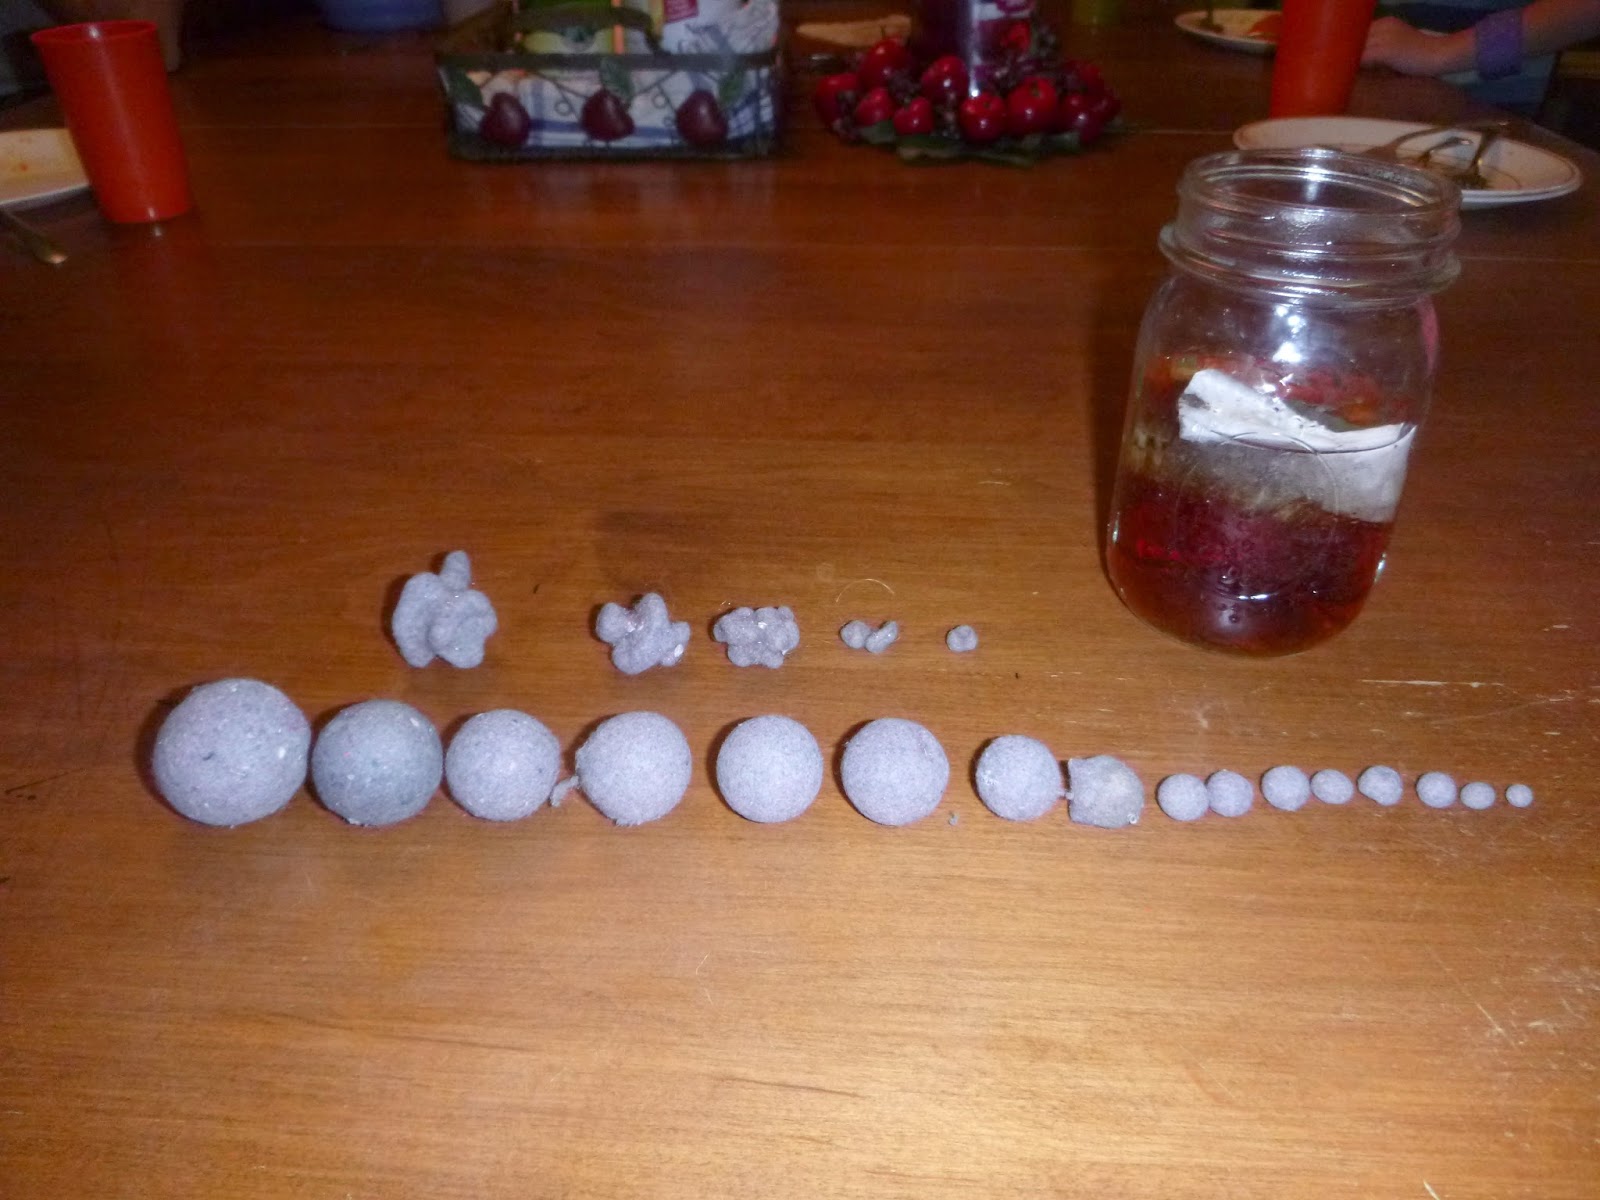 |
| in order of size |
No comments:
Post a Comment